
Shape of Dreams Beginner Guide: Your First Run and How Long It Takes
Start on Nap with Lacerta for ranged combat or Mist for mobile melee. Learn one main damage skill, keep a defensive option, and use early rooms to improve your build before the first boss. Exploration pays, but a tempting reward is not worth losing the run to Hunters you cannot handle yet.
For scheduling, allow roughly 40–60 minutes for an ordinary co-op clear without loops. Learning, discussing upgrades, and exploring can take longer; dying early can make an attempt much shorter. You do not need to finish every run in one sitting, and one clear is only part of the game's progression.
Set up a first run you can learn from
Complete the tutorial, then choose a starting Traveler whose combat style appeals to you. Lacerta lets you practice keeping enemies at range. Mist suits short melee engagements followed by movement to safety. The character roster covers the other Travelers and their combat roles.
Stay with your choice long enough to learn the basic attack, dodge, starting Memory, and Identity. Switching after every defeat makes it harder to tell whether the problem was positioning, an unfamiliar skill, or an upgrade that did not fit.
Choose Nap while learning. The higher base difficulties are Deep Sleep, Ominous Dream, and Nightmare; Lucid Dream modifiers add more choices later. A harder setting is not a required first step toward understanding the game.
Before fighting, locate these actions in your selected control scheme:
- Movement and basic attack.
- Dodge and equipped Memory casts.
- Loadout inspection and the map.
Use the bindings shown on your screen so you can find them without guessing during a fight. Then give the attempt one clear goal: clear the first biome, learn the boss's attack tells, collect useful Stardust, or test one Memory-and-Essence interaction. Reaching that goal gives you something to build on even if the final boss remains out of reach.
Move, attack, and leave a way out
A dependable combat loop is to avoid the incoming attack, deal damage during the opening, then reposition while your skill recovers. Use basic attacks between casts, but avoid standing still just to finish a sequence when an enemy has already committed to hitting you.
You can also practice an attack reset: use a suitable skill just after a basic hit to shorten the recovery before the next attack. Timing matters. Learn it with your chosen Traveler instead of pressing every available button at once.
Keep at least one tool that helps you survive. A Barrier protects against immediate damage, healing restores lost health, and a movement skill creates space. Filling every slot with damage can leave you vulnerable to the smaller hits that accumulate over several rooms.
Your first useful combat milestone is simple: clear a room without spending every dodge, identify what damaged you, and leave with a deliberate upgrade choice. If you can explain why a fight went badly, you already have a specific change to test in the next one.
Memories, Essences, and Stars do different jobs
| System | What it does | What to check before choosing it |
|---|---|---|
| Memories | Equipped abilities; Traveler Memories give you your initial tools, while common Memories can change the loadout | Damage, cooldown, scaling, and the role it fills |
| Identity Memories | Distinctive passive behavior that can shape a Traveler's playstyle | What you lose if you replace one, as well as what the replacement offers |
| Essences | Attach to a Memory to modify it or add effects | The exact trigger and which Memory can activate it reliably |
| Stars | Pre-run constellation benefits for damage, survival, economy, or particular skills | Whether the benefit solves your next run's main problem |
An Essence that triggers on casting does not work in the same way as one that needs a hit, a kill, or a particular damage type. Read the trigger before attaching it. A powerful effect placed on the wrong Memory may contribute far less than a simpler effect you can activate often.
Check scaling too. The orange sword represents Attack Damage, while the blue symbol represents Ability Power or ability damage. Choose effects that suit the stats you are building; a more expensive option is not automatically an upgrade if it relies on a stat or trigger you rarely use.
Your normal Identity deserves careful consideration, but it is not permanently irreplaceable. Version 1.4 introduced common Identity Memories and expanded Traveler Mastery into The Way of Stars. Treat those later options as deliberate build changes, rather than assuming every passive is something to keep or discard automatically.
Explore for upgrades without ignoring Hunters
Open the map and read the available nodes before moving. Early encounters provide experience and resources; shops and wells become more valuable when you can afford a useful purchase or upgrade. In the first biome, gather enough strength to improve your main skill before committing to the boss.
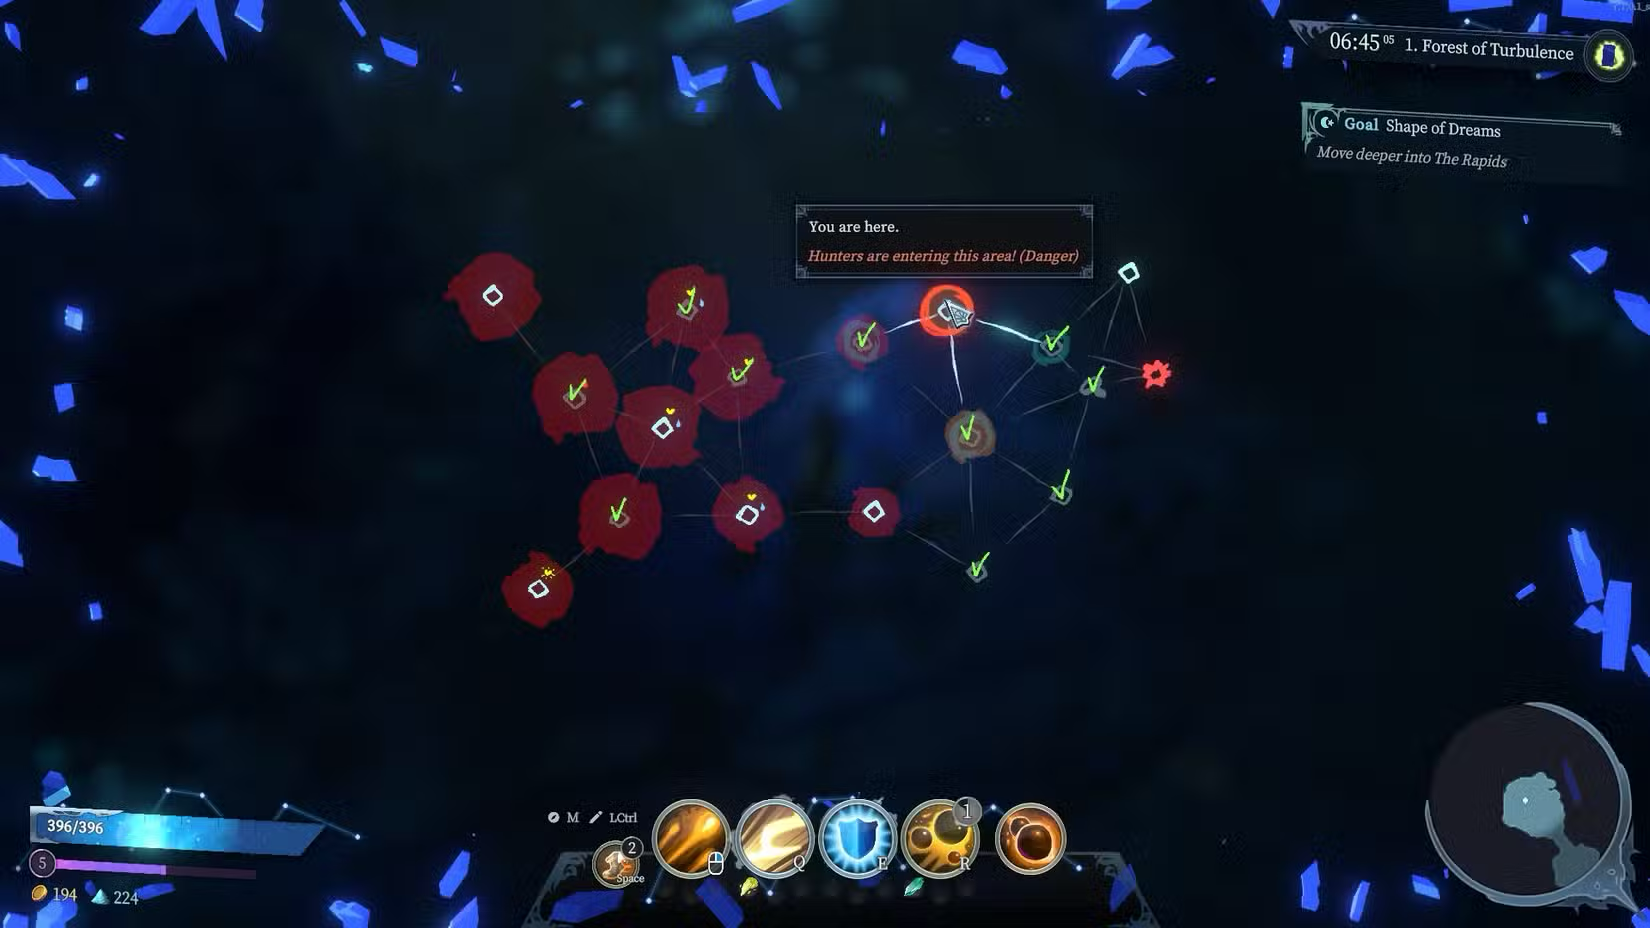
Hunters spread across the map, and fighting in their territory raises Hunt Threat. They can offer valuable experience and gold, but dangerous detours become much less attractive when your health is low or your build lacks sustain.
Before chasing a distant reward, consider the fights required to reach it. A shop is only useful if you survive the journey and can afford something that improves your loadout. Clear more rooms when the reward and your current strength justify it; do not treat every red node as mandatory.
Once damage and survival are working, stronger encounters can be worthwhile. Until then, avoid copying an advanced Hunter-farming strategy simply because it produces impressive rewards for a finished build.
Spend the right resource on the next problem
| Resource | Main use | Practical early decision |
|---|---|---|
| Gold | Buy Memories and Essences at shops | Save for a useful piece rather than replacing a working skill without a plan |
| Dream Dust | Upgrade equipped tools at wells; dismantling unused items can provide more | Improve the Memory or Essence doing the most work |
| Stardust | Persistent progression between runs, including Stars and unlocks | Choose a benefit that addresses repeated failures or missing options |
Sell an unused item when gold will help you make a useful shop purchase. Dismantle it when Dream Dust will improve a tool you already use. Keep usable defense until you have a replacement; an item is not spare merely because it deals little damage.
Concentrate early upgrades on one main damage Memory and the effects that make it work. Evenly leveling every slot can leave the build's key interaction too weak when you reach the boss. Once damage is sufficient or the next upgrade becomes expensive, improve the missing part: cooldown, Barrier, healing, or health.
Between runs, spend with the same purpose. If you repeatedly die before the build develops, survival Stars are a sensible starting point. If you can survive but struggle to find the right pieces, economy and merchant options can make the search easier.
How long is one Shape of Dreams run?
Plan around 40–60 minutes for a normal co-op clear without looping. That range fits small-group and four-player sessions that include time to trade items and choose upgrades. It is a practical planning range, not a universal average or a promise that a solo attempt will finish within an hour.
For planning here, a run starts when you enter the attempt and ends when you die or defeat the final boss to complete it. Lobby setup is extra. Suspending and continuing the same attempt later does not make it a new run; this definition does not depend on how the in-game timer counts menus, pauses, or loading.
| Type of attempt | Useful expectation |
|---|---|
| Ordinary co-op clear, no loops | Around 40–60 minutes |
| Familiar, fast route | Around 20 minutes is possible |
| Learning, discussing gear, or thorough exploration | A clear can stretch toward 90 minutes |
| Early defeat | An attempt may end in 10–20 minutes |
| Repeated loops | The same run can continue for several hours |
These are examples of how runs vary, not minimum and maximum limits. Build decisions can take as much attention as combat, especially when several players are comparing items.
Finish the ordinary route or choose a loop
An ordinary clear ends by defeating the final boss. The choice to loop comes before that fight, at the end of the fourth world:
- White portal on the left: continue to the final-boss zone. Choose this route when you want to work toward finishing the attempt.
- Blue portal on the right: return to the first world for a loop. Your levels, Memories, Essences, and upgrades carry over, while the enemies become harder.
Looping extends the same run; it is not an extra circuit after an already completed clear. If you have a strict stopping time, leave room for the final fight and build decisions rather than starting another loop near the end of your session. Some progression rewards require defeating the final boss, so returning to the first world does not replace that finish.
These directions describe the ordinary route. Version 1.4 also adds The Starless Path, a later ending route unlocked through The Way of Stars, with another final boss. The ordinary finish-versus-loop choice does not cover every ending you can eventually pursue.
Solo play supports pausing and suspending a run to continue later, so a short session does not require a full clear. Use the game's save-and-continue flow when stopping. In co-op, agree on a stopping point: if the host leaves, the party disconnects. Do not rely on an unplanned network interruption as a substitute for saving.
One run is also different from completing all the game's unlocks, achievements, and progression. Those involve repeated attempts. A 40–60-minute clear does not mean you have finished everything Shape of Dreams offers.
Choose the next step after the run
Keep the same Traveler if you understand the cause of failure and have a targeted upgrade to try. Switch when you want a different combat style, rather than treating one unlucky shop as proof that the character cannot work.